Saturday, May 12, 2012

Fleece Headband -- Ear Warmers


I live just outside of Houston, Texas.  We don't really have cold winters -- some years, we never even get to wear a sweater.

So -- when a surprise cold snap rolled through right before Christmas, no one knew where any of our cold weather gear was!  So ... I figured I'd make some -- and I'd start with a pair of fleece headband/ear warmers.

I had a bit of fleece scraps lying around -- definitely within the one yard parameters.  Here's what I ended up with after I completed the project.

I decided to use a double layer of fleece rather than a single layer.  It makes assembly a little more involved, but also means I can mix colors.  I can do these in purple and gold for my LSU friends!  This time, all I had was red, black, and blue -- so that's how my headbands ended out.

Even with double layers, it was pretty simple to make.  Total time?  About 10 minutes per pair.

First, we need a pattern! Use a tape measure to measure the circumference of your head. Pass it around the middle of your forehead and just at the top of your ears.

Take this number, divide it by 2, then subtract 1/4" inch. For instance, if your head circumference measures 23 inches, then divide this by two to get 11 1/2 inches and substract 1/4 inch from that to yield 11 1/4 inches. This will be the Length for our pattern.

Draw a rectangle Length inches by 4 1/2 inches (in my example above, it would be 11 1/4 inches by 4 1/2 inches). Draw a little dot at the midpoint of the Long sides.

Next, draw a dotted line one inch in from each end of the rectangle. This dotted line will cross the width of the rectangle (the 4 1/2" portion).

Next, draw a dotted line 3/4 of an inch in from each corner of the rectangle. This dotted line will reach from the prior dotted line out to the end of the rectangle.

The end result of all this is that we'll have dotted "notches" in each corner -- each notch being 3/4" by 1" in size.

Now, here's the hard part. (At least, it was hard for artistically challenged me!). Draw a freehand curved line from each midpoint side that meets up with the dotted line leading to the end of the rectangle. That's four curved lines!

It'd be nice if they matched exactly -- although the way we cut and sew this, it's not that important. Still, the closer you can get them to matching, the better it will be.

You can see the results of the curved lines on the pattern to the right. The line is almost a lazy "S" shape -- it curves one way from the mid-point, then switches off and curves the other way as it reaches to the edge of the pattern.


Time to cut! Use two pieces of fleece about 6 inches wide by 25 to 27 inches long -- you want the length to be twice your Length measurement plus a little extra if you need to cut off selvedges. Be sure that your fleece will stretch in the Length direction!


Now, fold each fleece portion in half. Lay the two fleece pieces on top of each other -- match the folded side!


Try to make sure that the good side of the fleece is on the same side on both pieces of fleece. I'm using good side instead of right side because one side may be fluffier or fuzzier than the other. Let the most comfortable side the the good side!


Now, lay the pattern on top of the fleece. Match one end of the pattern with the folded side of the fleece. We're not going to cut along this line!

I've used this pattern a couple of times -- it's a little chewed up by now but is still usable.

Do not cut along the sides of the pattern the very first time you use it.  Instead, cut about 1/4 inch outside for a seam allowance.

After you've cut the pattern once, you'll already have the seam allowance in the pattern. In that case, it's okay to cut along the edges of the pattern.

I've already used this pattern once -- you can see my lines about 1/4 " inside the cut edges. In this case, I'm going to cut along the edges of the pattern since I've already got the seam allowance cut.

I used a rotary cutter.  Since I was pressing down through four soft layers of fleece, I tore the pattern a little. Using scissors probably would have made a difference.


Still, the rotary cutters still worked fine for cutting the fleece. I now have two pieces of different colored fleece that I'll use for the earwarmer.

Note that my curved lines don't look at all the same. That's not going to be a problem because we'll even them out when we sew.


Unfold the two pieces of fleece -- they're in the shape of a really stretched out bowtie.

Match the good sides of fleece together -- remember, the good side is the comfortable side -- and pin the pieces together.

We're now going to sew along three sides of this bowtie.


Begin at one end and sew along the curved sides of the bowtie. Try and use about a 1/4" seam allowance. Sew along both long sides and one short side -- we'll leave the other short side open.

At this point, we've sewed up three sides of the bowtie.
Remove the fleece and lay it flat on your cutting table.

Trim the seam allowances -- try to get about a 1/8" seam allowance. Cut it as if you were going to do a French Seam.

Getting close now. Let's turn the piece rightside out!

I found it easiest to get it started, then to pull the turned piece through rather than try and push it through.

When you finish turning, it'll look something like this!

A little too roly-poly, don't you think?

Let's finger press this flat. Work the seams and try to roll everything flat. You'll probably have to work some of the seams to the edge of the piece.

I didn't iron things flat -- I wasn't sure if my scraps were polyester fleece and I didn't want to risk melting the fabric.  Finger flattening actually worked pretty good.

Here's the roly sack after it's been flattened! Starting to look a little like an ear warmer!

Actually, we could just join the two ends together right now and be finished. I found that if you did, though, you ran the risk of the colored sides "rolling" a bit. Instead of seeing a blue or a red front, you might see a blue/red front.

This might not be a problem -- if you're using school colors, you might actually prefer this! I thought I'd try and stop it from happening, though.


I decided to topstitch some "anti roll bar" lines along the ear portions of the fleece.  Here's what they looked like after the headband was finished.


However, after sewing the anti-roll-bars, you still have one thing to do -- join the two ends! There's a bunch of ways you could do this -- slipstitch by hand, roll one end in - hem - join, etc, but I decided just to slip the closed edge inside the open end and sew it shut. Not real pretty, but very quick and easy. You might even cover the join with a piece of ribbon.


And here's the finished product!  I'm glad I made two of these -- because my model wouldn't return this set!

This project's actually not a one yard project -- because I think you could make six headbands out of one yard of fleece!  Hope you find it's a nice way to make use of those fleece scraps!

Friday, May 4, 2012

Halloween Goodie Bags

We really enjoy holidays at our house -- and Halloween is a big favorite (one year we dressed up a medical skeleton in a tuxedo and sat him at an organ while a recording of Bach's Tocatta and Fugue blared away!  We call him Dr. Feelgood.)

I'm also funny about Halloween treats.  We don't get a whole lot of kids at our house -- so I like to give out good stuff (ie: full-sized candy bars) rather than the bulk bagged things.

The past few years, we've dressed them up a bit -- with little felt Halloween Treat Bags! I size them to fit the full-sized candy bars ... so the size isn't constant; it varies with the kind of candy I find. 


I like to use felt -- you can buy 9 x 12 felt pieces in lots of Holiday colors -- find them on sale and they're 10 for a dollar!  If I were doing a lot of bags (like maybe for a school or a party), then I'd go with a yard of felt.  I put handles on these with scraps of ribbon -- other years I've just hot-glued on pom-poms or scary eyes.Whatever looks like fun!


In this case, I took a 9 x 12 piece and cut it in half length-wise -- to give me two 4.5 inch by 12 inch pieces.


Next, take one side and fold it in half so that you have a doubled piece 4.4 by 5 inches.  Before we sew this, I'm going to use some pinking shears to pink along the unfolded "top".  You don't have to do this -- it's felt, so it's not going to unravel -- but I just think it looks neater.


Now, lets close the sides of the bag; we'll sew a straight stitch down the two "sides" -- AND ALSO along the folded bottom (there's a reason for this).  We're only sewing three sides -- we're leaving the pinked top open.

I used about a 3/8" seam allowance on the sides and about 1/2" on the bottom.


Adding the ribbon handles turned out to be the hard part (as in using up time) -- that's why I don't do it anymore!

Seems like it should be easy -- just take a piece of ribbon 8 about 8 inches long.  Sew one end to the middle of one side of the open top; sew the other end to the middle of the other side.

It should be easy -- but these bags are kinda little and my fingers keep getting in the way!  I ended out having to pin the ribbon down to keep it from slipping -- then I could sew it to tack it in place.  It doesn't have to be a real strong tacking -- you're only carrying a candy bar in this bag after all!


Here's what eight of them looked like. (That's four felt squares cut in half to yield 8 pieces of felt).

This time, I sewed the bags one at a time.  Last year, I placed two 9 x 12 felt pieces together, sewed the bags in place on the 9 x 12 sandwich, then cut out the sewed bags.  I don't know that it really saved me all that much time, though.

I guess it all depends on the size of your candy bars! 


To finish things off, I ran the pinking shears around the remaining three sides of each bag.  That's why we sewed along the folded bottom of the bag earlier!  We're now pinked on all four sides -- which I think makes the bags look "spookier".


And the end result -- here're some bags loaded with full-sized candy bars.  They're all ready for handing out on Halloween.

How do the kids like then?  Well, frankly, I think the kids focus on the candy!  However, their parents really appreciated the bags.  The kids liked them more when I skipped the handles and used glued pom-poms and eyes to make goofy "faces" on the bags.

Tuesday, May 1, 2012

One Yard Apron


I found this neat lady-bug fabric on the 50% off rack at JoAnns.  To top it off, I had a 50% off coupon for the 50% off fabric!  Problem was, there was only a yard left on the bolt.

Well, maybe not so-much-of-a-problem -- this'll make a really neat one yard project!  To make it even easier, the cuts are going to be very simple ... and there's only three of them! 


So I'm thinking -- an apron.  The fabric is bright, fun, and cheery!  How about an end result that looks something like this?

It's got a drawstring tie around the waist -- and some large pockets for spoons, tools, and other important things (well okay, cookies and TV remotes, too).

What makes this apron so easy to make are the fabric cuts -- there are only four of them.  Furthermore, the cuts are all straight across the grain of the fabric.  If you don't feel like laying the fabric out and using your scissors, you can cut small notches in the right places and just tear the fabric pieces.


I had one yard of fabric that was 44 inches wide; I cut it into four pieces across the width (44 inches).

The first two pieces were each 2 inches by 44 inches.  I have them folded in half in the picture -- so that it looks like two pieces that are 2 inches by 44 inches.  These two pieces will be our drawstrings.

After cutting the first two pieces, we've used up 4 inches of our 36 inch yard of fabric.

The next piece will us up another 11 inches.  Cut or tear a piece 11 inches tall across the 44 inch width of the fabric.  That's the squarish looking block you see above underneath the two drawstring pieces.   This will be the pocket on the bottom of the apron.

The remaining piece of fabric (all 21 inches of it) will be the body of the apron.  So -- we have four pieces -- two pieces 2 inches by 44 inches, one piece 11 inches by 44 inches, and one piece that's 21 by 44 inches.  2 + 2 + 11 + 21 = 36 inches for our one yard of fabric project!


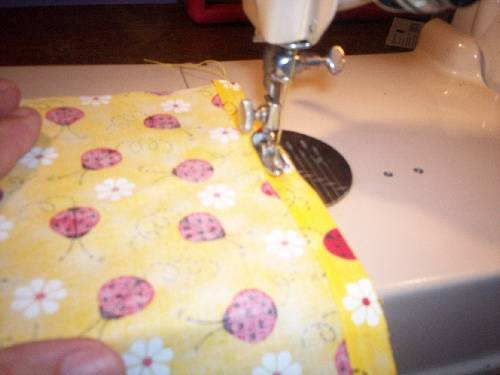
Let's begin sewing with the body of the apron -- since we cut across the width of the fabric, we may not need to finish the edges; they may be selvedge finished already.  In this particular case, I had a problem --  my selvedge had small logo running down the side.

I could have left it alone -- the selvedge did provide a good finish to the sides -- but having a logo ranging along the border just bothered me.  So -- I decided to "hem" the edge of the apron body to hide the logo.


 I didn't do anything special -- no serging or anything like that.  Just ran a simple double-foldover hem up each side of the 21 inch by 44 inch apron body piece.  The hems are on the selvedge edges -- so each hem is 21 inches long.

I folded about a half inch over, then folded another half inch over that to enclose it.  Then ran a quick straight seam down the edge to close the foldover.

Nothing fancy, but the logo is now hidden and the edges are protected from fraying.

If you decide to fold-over finish the edges of your apron body, you'll want to do the same thing to the edges of your apron pocket (the 11 inch by 44 inch piece).  Since the pocket will lay on top of the apron body, the widths should be the same.  Go ahead and do the same double fold over seam to the edges of your pocket if you need to.

At this point, we still have two unfinished edges of our apron body -- the top and the bottom.  We'll continue by finishing the top of the apron body.

Check the pattern on your fabric to determine which way it "up"!  In my case, I wanted most of the ladybugs facing towards the top of the apron.  So, I turned the fabric so the ladybugs faced to the top, then I sewed another double foldover seam along this top.

In this case, the top seam will also be our drawstring casing -- so we want to make it wide enough to hold the drawstrings.  I liked having a little "ruffle" along the top -- so I used about 2 1/2 inches for my foldover ... 1/2 for the first fold over (which I then sewed down), then 2 inches for the next fold over.

We're going to leave the opposite edge (the bottom) of the apron body unfinished for now.  When we join the pocket to the bottom of the apron, we'll have a chance to finish it then.

Thinking of the pocket -- that's the 11 inch by 44 inch piece -- let's go ahead and finish the top of this piece.  Again, check the pattern of the piece -- you want the pattern on the pocket facing in the same direction as the pattern on the apron body!

Again, I did a small 1/2 inch fold over first, then a wider 2 inch or so fold over second.  The second fold doesn't really need to be this wide -- but it seems to lay flatter if you do so.

Note how the edges of the pocket were already finished with the 1/2 inch double fold over we did earlier!

At this point, the bottom of the apron and the bottom of the pocket are still unfinished.  We want to join the bottom of the pocket to the front of the apron along the bottom.  You have a couple of options here.


I took the easy way out and just pinked the edges.

First, I joined the two unfinished edges of the apron body and pocket, good side (front of pattern) of pocket to bad side (rear of pattern) of apron.

I sewed a straight seam along the width of the join -- then I used my pinking shears to pink along this unfinished edge.

If you wanted to get a little fancier, you could try a French Seam instead.

One you've done, fold the pocket up along the seam so that the front sides of both pocket and apron are on the same side -- then, sew a simple straight seam along the edges of the pocket

At this point, you have a very wide pocket!  You may wish to sew some extra straight seams up the length of the pocket to subdivide it into smaller sections.

 I broke mine into four sections -- two about 8 inches wide along the sides, and remaining two separated by a single seam in the middle of the pocket.

You can see how I tucked my pinking shears into one of the pockets to show you where they are.

We're done with the body of the apron -- time to finish up with the drawstrings.  Remember those two 2 by 44 inch pieces?  We're using them right now.


This part is simple -- doing one piece at a time, fold them in half width-wise to make a 1 inch by 44 inch piece (matching good side to good side)-- and then sew along the width of this piece.  You'll have a long "tube" about 44 inches long.  Go ahead and sew one of these ends closed -- but not both ends!

Do this to both drawstring pieces.


Now for the "fun" part (not really, I always hate this part).  We need to turn these two drawstring pieces inside out.  Use your favorite technique and curse words here.


I used a long, thin dowel that I had sitting around.  There are other techniques that may work better -- and others that may work worse! 

Once you've done this, you have two long, thin drawstring tubes about 44 inches long each.

Join these two pieces together to make a single piece 88 inches wide.  You don't need to do anything fancy or pretty at the join -- the drawstrings will be inside the apron casing and non one will be able to see the join.  Just make it strong.

Just about done -- we now need to pull the drawstring through the apron casing.  There are lots of techniques and tools to help you do this -- but this one is my favorite.

It's my favorite because it's simple and it always works.

Find a decent-sized safety pin -- you don't want a small one that you can't feel -- and pin it to one end of your drawstring.  Next, stick the safety pin end inside the apron casing and work the safety pin through the casing.  It's big and stiff enough that you can feed it through with you fingers -- and it will pull the drawstring along through as it feeds.

Here's the end result -- we've pulled the safety pin and drawstring all the way through the apron casing.

The casing will bunch up as you pull the drawstring through -- this is good because I want the top to look a little "ruffly".

Be careful as you pull the drawstring through that you don't pull the other end into the apron casing.  Since that end won't have a safety pin attached, you'll find it very difficult to pull back out.

Because of this, once you get the drawstring through, you might want to even out the two ends of the drawstring and take a quick stitch through the middle of the casing -- this will "lock" the drawstrings in place so they can't accidentally get pulled out.

We're done -- here's the finished product!


To tell you the truth, even though the apron looks and works great, I don't use it that much -- as an apron.  I use it as a decoration instead!

I've made several aprons using this technique and have them arranged in the kitchen as decorations.  Some are just for bright and cheery colors -- and others I've made with "holiday" fabric (Christmas, Halloween, Thanksgiving, etc).  If you plan ahead, you can pick up a few yards when the holiday goes "out of season" for next to nothing -- and have some unique and useful decorations when the season rolls around again!