 I travel around a lot for work -- which means I seldom get to bring my lunch to work. Most of the time, I'd rather have a cheese sandwich from home than whatever I have to grab at a company cafeteria.
For those times when I can bring a sandwich, I normally carry a little brown paper bag. This got me thinking -- instead of a tossable paper bag, why not make a washable cloth "paper bag like" bag?
The plan -- use some fat quarters that I had lying around. Each quarter is one-fourth of a yard of fabric -- 18 inches by 22 inches. Here's what I wanted to make.
No fancy plans -- just follow what a paper bag looks like ... just make it from fabric instead!
 Even though a single fat quarter is plenty for the bag, I decided to use two pieces -- this lets me have different colors for the front/back and the two sides. I decided to use French Seams to finish the edges -- but I thought I'd put the bound edge on the outside, rather than the inside. Thought it might give it a slightly different look.
So -- I grabbed two fat quarter pieces in contrasting colors. I originally bought these at a 99 cent special -- but two pieces have plenty of fabric to make at least three or maybe four bags.

I wanted to keep the proportions about the same as a small lunch-size paper bag. I figured the width of the front to be about six inches -- and the width of the sides around 4 inches. I didn't do any fancy measuring, just eyeballed things until they looked right.
I began with the front/back piece -- I wanted two pieces about 18 inches by 6 inches. So, I measured off about six inches, made a slight cut, then tore the fabric across for my first piece. I then did the same thing to cut by second piece.

These two pieces will be my front and back sides of the "paper bag". I'm going to join them together to make a single 36 inch by 6 inch piece. I didn't want a pokey seam at the join -- wanted something flatter -- so I used a flat-fell seam to join the pieces.
You can see my two pieces aren't the same width -- that's what happens when you eyeball instead of measuring! No problem, I'll just trim the extra wide piece so that both pieces match.

After trimming, I folded the piece in half with the flat-fell seam at the fold. This fold will end out being the middle of the bottom part of the bag.
If I made the bag with this piece as-is, I'd have a really, really TALL bag!

I want to keep the proportions similar to a folded brown paper bag (hey, it's a proven design), so the next step is to trim the piece a little smaller.
Again using the "eyeball" method, I cut about three inches off the "top".

Time for the contrasting color sides. My plan is to have the flat bottom of the bag be the fold of the front/back piece.
I want the bag to be about four inches wide on the side.
So, I lined up my contrasting fabric at the "top" of my bag and cut an 8 inch wide piece that ended about 2 inches from the bottom seam of the bag.

I then cut this side piece in half, giving me two pieces each about 4 inches wide and about two inches shorter than half the front/back piece.

Now, the "tricky" part.
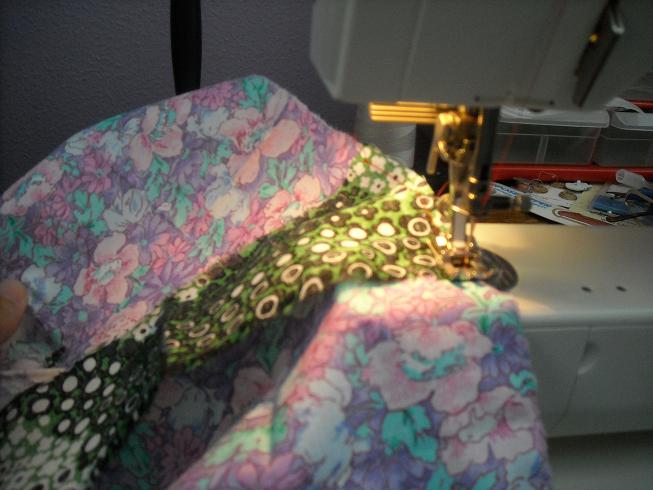
Normally when you do French Seams, you begin with wrong sides matched. Since I want the seam on the outside of the bag, we're going to begin with good sides matched.
Open up the front/back piece and lay it so the good side is facing up. Line up the good side of a side piece so that the middle hits the flat-fell seam of the front/back piece. The two pieces will make sort of a "T" shape. Line up and pin the edges.
When you get to the edge, lower your needle to make a "pivot" point.
 Now, raise your presser foot. Drag the side piece along so that the side matches up with the side of the front/back piece (The side piece used to point to 9 o'clock; make it point to 6 o'clock)
Position the "side" of the front/back piece so that it matches up with the edge of your side piece. Lower the presser foot and resume sewing!
You'll want to be careful you don't bunch up some of the front piece when you do this.
Sew along to the end of the side piece.
When you get there, reposition the piece so that you can sew up the other side of the side piece.
Here's what it looks like when you're done.
You know what comes next -- let's do the same thing with the other side piece.
About the only thing you can have go wrong here is to bunch up the fabric when you make the 90 degree turns at the bottom of the piece.

Try to keep about a 1/4 inch seam allowance as you sew.
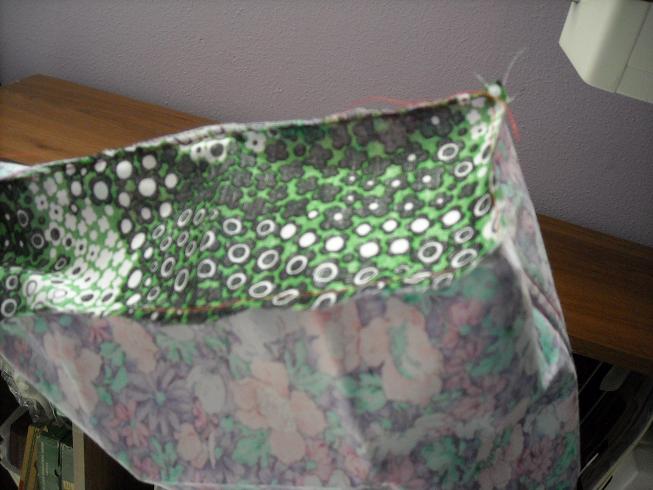
When you're finished with both sides, you'll have a "lunchbag shaped" bag. The edges will be raggedy ... but we're going to take care of that right now.
First, trim your seam allowance to about 1/8 inch.
Next, invert the bag -- turn it "right-side out". After you do, the good sides of the fabric will now be on the outside.
Here's where your personal preferences come into play. You see how the seams are a little "poofy" right now. We want them flat before we continue with the French Seam.

If you want perfect French Seams, you'll want to iron these seams flat so that the fold exactly at the edges.
If you're happy with okay French Seams, though (like me), then you can put your finger inside the bag, push along the edges of the seam, and "pinch" the edges flat.

Whichever method you use, the next step is to sew a straight seam along the edges. Remember, we've got a 1/8 inch raw seam on the inside. When you sew, use about a 1/4 inch seam allowance again. This will end up enclosing that raw seam that's on the inside!

Continue along all the edge sides where the two contrasting pieces of fabric meet. French seams always look a little like "piping" to me. Normally, you have the enclosed piece on the inside of your piece. In this case, I've arranged it so that the enclosed "piping-like" piece is on the outside. No special reason, I just thought it might look neat.

When the French Seam is complete, you're almost done. We just need to finish the seam along the opening of the bag -- and also add some velcro.

The top of the pieces at the opening of the bag are still raw -- I just inverted the bag and did a simple double fold-over hem along the top
You may have to trim the top edges to make them match before you begin the hem.

When done, invert the bag again. We now need to attach some velcro. Since I want to mimic a paper bag -- and since a paper bag will hold a fold where fabric won't -- we need a little help to keep the fold in place.
 Velcro will do the trick! I used a plain-old sticky velcro square.
I folded over the top of the bag once, then positioned a sticky velcro tab in the middle of the fold. I then placed the matching velcro piece on top, then folded the top over once more. This gives me a "double-fold" at the top that will remain in place.
After you fold the piece over, push down on it for a moment so the sticky velcro attaches fully.

After it's attached, you can unfold the top to see how the two velcro pieces line up.
And that's it -you're finished. My bag had plenty of room for a sandwich, a bag of chips, and a small pack of cookies. If you normally carry more booty for lunch, you might want to alter your bag dimensions to make it a little bigger.
For me, this "mock paper bag" works just right! If you figure two fat quarters will yield three or four bags, then a full yard (four quarters) will easily give you enough for a week's worth of washable lunch bags!
No comments:
Post a Comment