This one's a little seasonal -- and maybe it's on my mind because I've eaten so much candy corn lately! I just can't resist those things!
This fits in the one-yard framework -- to make 6 pillows (about 10 inches high), use 1/2 yard of orange, 1/4 yard of yellow, and 1/4 yard of white. I used el cheapo poly broadcloth -- next year I'll watch the sales and pick up some cotton when it's on sale.
You'll also need some polyfil. One bag will easily fill six pillows.
You can do most of the sewing on your machine with a straight stitch -- there's a tiny bit of hand slip-stitching involved when you close the pillow.
To begin, cut (or tear) off a 6 inch strip of orange -- end result will be 6 inches high by 44 inches wide. Then, cut off a 3 inch strip of yellow -- resulting in 3 inches high by 44 inches wide. Finally, cut a 3 inch by 44 inch wide piece of white. I said "cut", but I really just cut a little snip, then tore the fabric across the width of the fabric.
Join the pieces in "candy corn" order -- yellow, orange, white -- then sew them together using a 1/4 inch seam allowance. You'll join them just like you were piecing things together for a quilt. Be sure the yellow/orange seam ends up on the same side as the orange/white seam!
In this picture, I have the white side on top of the orange side -- since the orange is 6 inches and the white is 3 inches, half of the orange is under the white strip.
When you're done, you have a candy-corn colored strip of fabric, 12 inches high and 44 inches wide! One side has seams; the other side doesn't.
I ironed my seams towards the middle; I figured the seam allowance might show if it underlayed either the white or the yellow strip. Since the orange is darkest, I wanted the seam allowance beneath it.
Now, fold the strip in half -- yielding a 12 inch high by 22 inch wide folded piece.
Match the corners and sides very carefully --
now ...
Fold the strip again in half -- yielding a 12 inch high by 11 inch wide folded piece (it'll have four layers). We'll cut this stack to make four sides for our candy corn pillows (yielding 2 complete pillows).
You can make a candy-corn shaped template if you'd like -- or you can just eyeball like I did. I marked off three inches in the center of the white top. I then cut an angle from one edge this three inch white section down to just inside the yellow corner.
Next, I did the same thing on the other side of the piece. I didn't cut down to the exact yellow corners -- I wanted to make sure I cleared all the folds.
The two edges are scrap.
Now, take the top two pieces from the stack. Match good sides together (seams on the outside. Pin the pieces together, then sew them together -- use about a 1/4 seam allowance.
Leave a gap on the bottom -- maybe three inches or so.
When you get to the white and orange corners, sew a curved seam. Again, you can get fancy and use a template with curved corners -- or you can just eyeball the curves. When done, you can trim the corners to match the curves.
Almost done -- invert the pieces so the good side is on the outside (seams on the inside). Grab handfuls of you polyfil and start stuffing your pillow through the gap you left on the bottom!
Work the stuffing in to fill all the edges as best you can. You can continue to work the stuffing even after you've sewn the gap closed.
Once you've stuffed your candy corn, you'll hand-stitch it closed. I used a slip-stitch and yellow thread. Pinch the gap closed and handsew.
And here're my first-two pillows! These pillows are about 11 inches tall -- you can adjust your measurements to make your pillows whatever size you feel is best.
Note the jack-o-lantern pillows -- I made these using my removable, decorative holiday pillow covers.
Got scraps? How about those cool-looking fabric pieces you find on the bargain table -- not enough for a full garment, but perhaps a yard or so left on the roll? There are tons of things you can do with a yard or less of fabric! Here's a list of fun and useful projects you can try!
Sunday, October 14, 2012
Sunday, August 26, 2012
Pillowcase Dress (with Ruffle)
My granddaughter loves fairies -- and she seems to like this fairy print pillowcase dress, too! It was really easy to put together -- and took only one yard of fabric!
Yep, I know it's a little long. She wasn't around to measure, so I guessed. Guessed a little long, so I'll have to shorten it up next time she visits.
Here's how the dress came about:
We visited Gulf Shores, Alabama this past Fourth of July. There's a really nice fabric store on the way in as you head south off of I-10 towards the Gulf. We had a little spare time, so took the opportunity to pay it a visit.
Among the things we picked up was this neat fairy print -- perfect for the pillowcase dress I've been planning!
Picked up one yard for the dress -- 36 inches by 44 inches. First order of business -- join the two selvedge edges together to make a cylinder 36 inches long by about 44 inches in circumference.
I used a French Seam to join the two edges.
Next, I "flattened" the cylinder with the seam in the center of the back of the tube. This gave me a "rectangle" that was 36 inches long by 22 inches wide. Now, fold this rectangle lengthwise down the middle so that you have a rectangle 36 inches long by 11 inches wide. One "edge" of your rectangle is really the "center" of your dress; the other edge is the sides of the dress.
Make two cuts near the top of the rectangle. The first begins one inch down along the center edge and curves to about 2 inches from the opposite edge. This will be your neck line. The second cut begins at this 2 inch mark and curves downwards for about 6 inches. These will be your armholes.
This sounds screwy -- but the picture should make it clearer.
Unfold the garment and you'll see the basic form of your pillowcase dress. You have raw edges along the neck and the arm holes -- both of these need to be finished.
You could just use a roll-over hem along the armholes, but I used a bias tape hem instead. I guess it depends on your preference and perhaps the fabric print you're using. I had this little bit of bias tape left over from another project and thought I'd put it to use.
After sewing in the bias tape along the armholes, this is what the garment looked like.
I'm now going to use bias tape again for the front and back of the neck. I'm going to leave the ends of these two bias hems open -- because I'm going to use it as a casing to hold ribbon ties.
When I use a bias tape as a casing, I always fold in a half-inch or so on each end so that the end of the casing is finished.
I used a slightly wider bias tape for the neck lines -- this is to make it a little easier to thread a ribbon through the casings.
Run two ribbons through the casings -- one through the front neck casing and the second through the rear neck casing. It's okay to make the ribbons a little long -- you can trim them later.
I have all kinds of gizmos to help run ribbons or cords through casings -- but nothing seems to work better than attaching a sturdy safety pin to one end and just working it through.
After running the two ribbons, tie the front-back left ribbon ends together, then tie the front-back right ribbon ends together. This'll help stop the ribbons from sliding back through the casing!
You see how the front/back of the dress gathers along the casing -- you'll adjust this as necessary when you fit the dress to your model!
Okay -- now for the hard part. It's actually not hard, it's just that I don't have my model handy to check the sizing. The 36 inch "length" of my dress is way too long -- but I don't know exactly how much too long. So -- I'll guestimate. I'll make things a little long since I can alway shorten it later if I need to. I'm going to cut about 12" from the length of the dress!
Now -- I have a little bit of a dilemna. I could hem the bottom and call it done -- but I really want to put a ruffle at the bottom of the dress. However, if I use a contrasting print or solid, then I violate my "1 yard of fabric". So -- I'll use my trimmed length extra for my ruffle.
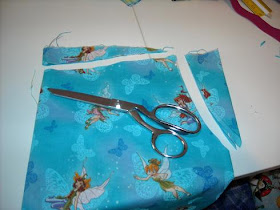
I've trimmed a cylinder about 12 inches long by 44 in circumference. First, I'll cut away the French Seam join -- giving me a 12 inch by 44 inch (approximate) rectangle.
Next, I'll cut this in half -- giving me two 6 inch by 44 inch rectangles. I'll then join these two pieces to give me a 6 inch by 88 inch rectangle -- and then sew the ends together to give me a cylinder 6 inches high by 88 inches in circumference.
Important!!! Take note of your print orientation if you're using a printed fabric! I had to make sure all my fairies kept facing in the proper direction (didn't want no upside-down fairies!)
Next, I sewed a roll-over hem along both the top and bottom of the cylinder. Probably didn't need to do this ... but I'm making this up as I go along and it seemed like a good idea at the time!
Now -- to attach this 88 inch cylinder to my 44 inch pillowcase dress cylinder. I'll gather as I go -- creating my ruffles.
There are several ways to do this -- I used the same method I used when I did the Fleece French Beret. I have two "circles" of fabric -- one 88 inches, the other 44 inches (the bottom of the dress). Pin the two together at the seam. Now, if this pin is the 12 o'clock position, then pin again at the equivalent 6 o'clock positions. Now, pin again at the 3 o'clock and 9 o'clock positions. You now have 22 inches of "ruffle" fabric attached every 11 inches on the pillowcase dress bottom. Now, I just need to sew along the edge -- gathering the 22 inches so that it fits in each 11 inch segment. Kind of like attaching a sleeve.
Unfortunately, my camera hiccuped during this process and I don't have a picture of the pinned ruffle before and after sewing. My bad!
But -- here's the results on the model after the gather! Okay, I'll have to come back and shorten the dress. I'll remove the ruffle edge, trim the main dress shorter, then reattach the ruffle edge. Maybe I'll use a bit of ribbon, trim, or rick-rack to hide this cut line?
Hmmm ... this looks kind of nightgowny, doesn't it. Maybe version two will be a soft cotton or flannel and I'll leave it this length for a nightgown!
Thursday, July 26, 2012
Tarot Bag
Okay, so I figure you can probably tell this is a bag of some kind, correct?
Betcha can't guess what it's for! (well, okay ... the title does give it away!)
But -- if you guessed Tarot Cards, you're right!
I normally keep my Tarot cards in little wooden boxes that I make (but that's another story). Recently I had a need for some fabric bags to hold some of my decks.
Tarot card bags are kind of a standard thing -- if you go to Ebay, you'll find a few zillion of them. Practically every one is just a drawstring bag, though. Not that I have anything against drawstring bags -- I just wanted something different.
I wanted a cotton bag (it has to be an organic material) and I also wanted a little pocket or pouch in the bag where I could store a small cache of herbs. I like to keep certain herbs next to a Tarot deck that I use a lot -- I really find it helps keep the deck active.
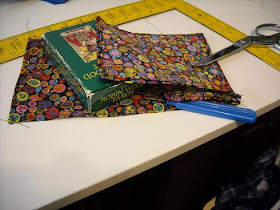
Tarot decks come in a wide variety of sizes -- I'm sizing mine to fit my Robin Wood deck, but I'm making it a little large. I'm measuring the box the deck came in -- it's 3 inches wide and 5 inches high ... and about an inch thick. I'll normally take the cards out of the deck when I put them in the bag.
I had a couple of fat quarters left over from a project -- and figured just one 18" x 22" piece would do just fine for the Tarot bag. I cut a 7" strip along the 22" length of my fat quarter. From this, I cut a 5" piece for my pocket (5" x 7"). I cut the remaining 18" x 7" piece so that I had an 11" back piece and a 7" front piece.
First, I sewed a tight double-rolled hem along all four sides of all three pieces. I could probably get away without doing this on all sides, but I'd rather do it and not need it than not do it and need it later!
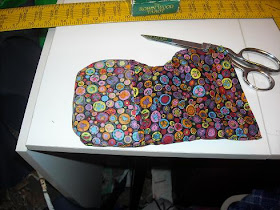
Now, I'll assemble the bag. Lay the longest piece down, wrong side down (pattern side up). Next, lay the pocket on top of this (align all the pieces along the bottom edge), pattern side down. Finally, lay the remaining shorter piece on top of these, pattern side down. Make sure all pieces line up at the bottom and the edges.
Now, sew the pieces together. Leaving about a 1/2" seam allowance, join the three pieces. Sew along the sides and the bottom -- sew 7" up each side to set the front and back (and the pocket) and also sew along the bottom to set the bottoms.
Time to invert the bag -- it's already inside-out, so you want to turn it outside-in! But wait -- once you do, the wrong-side of the pocket is facing the outside? What went wrong?
Nothing went wrong -- it's time to invert step #2. Just invert the pocket piece (you basically flip the pocket from one side of the bag to the other). Once you've done that, all three pieces have the pattern side on the outside.
Check your bag for fit -- clip away stray threads and such while you're at it. Work the inverted corners so they straighten out as much as you can. It's okay for the deck to fit loosely (well, unless you want to make it a tight fit). A loose fit means you can use different sized decks fairly easily. Close the flap to see how things look.
Once I closed my flap, I felt the hemmed sides on the flap part stuck out too far. So -- I took the bag back to the machine and doubled over the rolled hem to make the sides a tiny bit narrower.
Checking fit once again, I like it better now. Now I'm trying to think how I want to secure the flap.
I'll position the button, mark it, then open the bag and take it to the machine for a buttonhole. One of the things I like best about my Bernina 930 is that it makes wonderful buttonholes.
Once the buttonhole is sewn and cut (I use a seam ripper to cut it open), I'll check the button position and sew the button on. Rather than fiddle with the machine, I just sewed the button on manually. One button I'll do manually; if it's more than that, I'll break out the button foot and use the machine.
And there's the finished product! It's hard to see one the small photo, but if you double-click it to view it larger, you can see the pocket in the front. Plenty of space for herbs, tea-bags, etc -- what feels right to place next to the Tarot deck.
Tuesday, July 17, 2012
Dish Towel Tote Bag
This one was kind of an accident. I had wanted to make a placemat totebag -- take two placemats, sew together, add straps -- and voila, a totebag! Problem was, I never could find a color/pattern placemat that I liked.
Was in a kitchen store and finally found just the right placemat! Bright colors, nice pattern -- just what I wanted. Picked them up, showed it to my wife and explained how I was going to make a placemat totebag (we do a lot of beach trips, so always need more tote bags).
She though it was a good idea, but said "But that's a dish towel, not a placemat." I began to correct her, then looked closer at my "placemat". Darned if it wasn't a dish towel, after all!
Okay, I can salvage this. My original plan of sewing two "mats" together wasn't going to work -- dish towels aren't as stiff as placemats, so I'll have to use just one towel and reduce the size.
The towel already has finished edges -- and I wanted to keep these. So -- I folded the towel in half -- that puts the finished edges on the sides.
And the problem now -- is that that the pattern is upside down on one side after folding!
Alright, I can fix this. I'll just cut the towel in half and then set the two sides together ... being careful to orient the pattern the same way on both sides. This means my already finished edges on the top of the bag are now at the bottom of the bag-- meaning I'll have to hem the top. I guess that's better than having upside-down flowers on my tote bag, though.
So -- quick and dirty -- I sewed a double-roll hem along the cut sides along the "top" parts of the bag. I used red thread because I thought it stood out a little and looked nice. Here are my two pieces after the hemming.
Ready for the next step -- I matched the good sides of the bag and sewed the bag together on three sides. Note how the bottom seam has a little greater seam allowance -- this is because the "bottom" of the bag was the original "top" -- and it had the store-bought finished seams. They were kind of thick -- rather than try to fold them, it was easier just to sew just above them.
Next part's pretty easy -- turn the bag right-side out and attach the straps. I used some 1-inch webbing. I wanted the straps a little long since I envisioned hanging the bag off our shoulders rather than holding it in our hands. So -- I cut two 32" pieces of webbing.
I'm really conservative when I attach webbing to a bag. I figure I'm going to load the bag up with books and stuff and don't want the strap to tear loose. So -- here's how I normally do it:
I attached my straps about three inches in from the sides of the bag. Three inches isn't a magic number -- it just looked kind of right on this side bag. I positioned one strap about three inches in -- and arranged it so that the strap flowed towards the bottom of the bag.
I sewed a "square" to attach the strap -- the square is about 3/4" along each side.
Now, I fold the strap back up towards the top of the bag. This covers my initial sewn "square".
I'm going to sew this strap down again -- this folding over and sewing twice will securely attach the webbing -- and finish the webbing edge as well.
When I sew my folded over strap, I again sew a square -- but I then sew an "X" in the middle. I'm sure this is over-engineered -- but I've never had a strap tear loose, either!
Follow the same scheme to attach the remain ends of the straps. Be sure you don't have any twists in your strap before you secure the ends to the bag (found this out the hard way!)
Here's the finished product with the long straps:
By the way, I created all this trouble for myself when I selected a "placemat" where the pattern had a definite "up-down" orientation.
I liked the bag so much that I bought another dish towel -- but this time the pattern didn't really have an upside-downside. That let me do my original "fold the towel in half, sew the sides, attach straps" scheme.
Here's what it looked like: