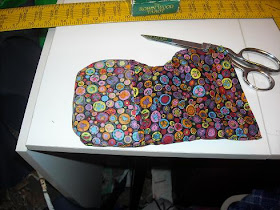
Okay, so I figure you can probably tell this is a bag of some kind, correct?
Betcha can't guess what it's for! (well, okay ... the title does give it away!)
But -- if you guessed Tarot Cards, you're right!
I normally keep my Tarot cards in little wooden boxes that I make (but that's another story). Recently I had a need for some fabric bags to hold some of my decks.
 Tarot card bags are kind of a standard thing -- if you go to Ebay, you'll find a few zillion of them. Practically every one is just a drawstring bag, though. Not that I have anything against drawstring bags -- I just wanted something different.
I wanted a cotton bag (it has to be an organic material) and I also wanted a little pocket or pouch in the bag where I could store a small cache of herbs. I like to keep certain herbs next to a Tarot deck that I use a lot -- I really find it helps keep the deck active.

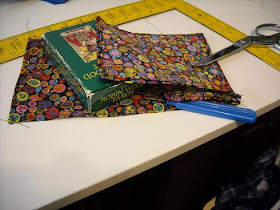
Tarot decks come in a wide variety of sizes -- I'm sizing mine to fit my Robin Wood deck, but I'm making it a little large. I'm measuring the box the deck came in -- it's 3 inches wide and 5 inches high ... and about an inch thick. I'll normally take the cards out of the deck when I put them in the bag.

I had a couple of fat quarters left over from a project -- and figured just one 18" x 22" piece would do just fine for the Tarot bag. I cut a 7" strip along the 22" length of my fat quarter. From this, I cut a 5" piece for my pocket (5" x 7"). I cut the remaining 18" x 7" piece so that I had an 11" back piece and a 7" front piece.
First, I sewed a tight double-rolled hem along all four sides of all three pieces. I could probably get away without doing this on all sides, but I'd rather do it and not need it than not do it and need it later!
Now, I'll assemble the bag. Lay the longest piece down, wrong side down (pattern side up). Next, lay the pocket on top of this (align all the pieces along the bottom edge), pattern side down. Finally, lay the remaining shorter piece on top of these, pattern side down. Make sure all pieces line up at the bottom and the edges.
Now, sew the pieces together. Leaving about a 1/2" seam allowance, join the three pieces. Sew along the sides and the bottom -- sew 7" up each side to set the front and back (and the pocket) and also sew along the bottom to set the bottoms.
Time to invert the bag -- it's already inside-out, so you want to turn it outside-in! But wait -- once you do, the wrong-side of the pocket is facing the outside? What went wrong?
Nothing went wrong -- it's time to invert step #2. Just invert the pocket piece (you basically flip the pocket from one side of the bag to the other). Once you've done that, all three pieces have the pattern side on the outside.
Check your bag for fit -- clip away stray threads and such while you're at it. Work the inverted corners so they straighten out as much as you can. It's okay for the deck to fit loosely (well, unless you want to make it a tight fit). A loose fit means you can use different sized decks fairly easily. Close the flap to see how things look.
Once I closed my flap, I felt the hemmed sides on the flap part stuck out too far. So -- I took the bag back to the machine and doubled over the rolled hem to make the sides a tiny bit narrower.
Checking fit once again, I like it better now. Now I'm trying to think how I want to secure the flap.

I'll position the button, mark it, then open the bag and take it to the machine for a buttonhole. One of the things I like best about my Bernina 930 is that it makes wonderful buttonholes.

Once the buttonhole is sewn and cut (I use a seam ripper to cut it open), I'll check the button position and sew the button on. Rather than fiddle with the machine, I just sewed the button on manually. One button I'll do manually; if it's more than that, I'll break out the button foot and use the machine.

And there's the finished product! It's hard to see one the small photo, but if you double-click it to view it larger, you can see the pocket in the front. Plenty of space for herbs, tea-bags, etc -- what feels right to place next to the Tarot deck.


